Any unsupported device drivers, or codec packs can cause errors in video playback. So don’t be surprised to see a video file becoming corrupt because of unusual interruptions during downloading, transferring, or playing. The same playback story shares thousands of users on Plex. They are also encountering the “an error occurred loading items to play†Plex issue.Â
So if you are facing a similar problem, here you will find 5 ways to resolve the playback error. In fact, the article focuses on the main ‘loading items’ error as well as six other problems related to playback.Â
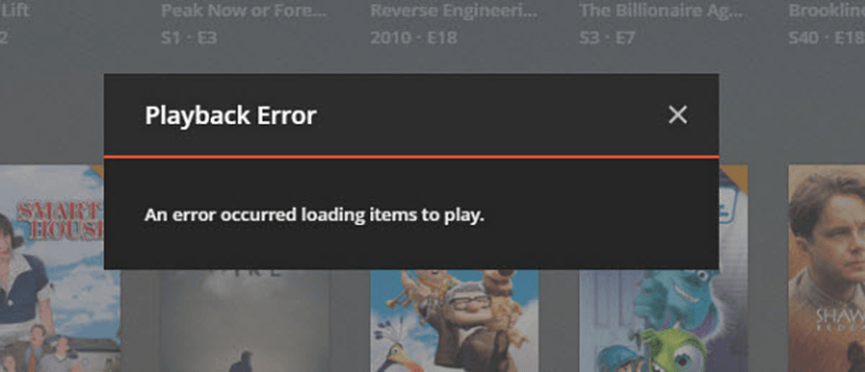
Table of Contents
Why Do You See an Error Occurred Loading Items to Play Plex?
There can be many reasons leading to the loading items error on Plex. However, the most common cause is a slow internet connection. When the internet speed is poor, your device cannot maintain a connection between Plex’s client and server. This leads to show up the playback error whenever you try to play your favorite movie.Â
Another possible reason is the update that may cause bugs in the Plex app. In such cases, you need to wait for the developers to fix the issue. You won’t see the error once the bugs are identified and eliminated.Â
5 Fixes to An Error Occurred Loading Items to Play Plex
If you see this prompt while playing a movie on Plex “an error occurred loading items to play,†you should try the following solutions. As one of them will surely resolve the problem.Â
Fix 1: Uninstall and Reinstall Plex (for DietPi and Rasberry Pi Users)
This solution is for Dietpi, and Plex Rasberry users who see an error occurred loading items to play. Since both systems have the same uninstallation and reinstallation process, you can follow the steps below to proceed further.Â
- Step 1: Open the command window on your computer with Dietpi OS.
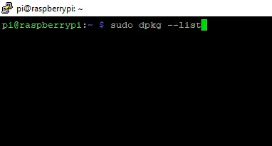
- Step 2: In the window, type “sudo dpkg –list†to see all the items installed on your computer. Remember, you need to type the command correctly. Otherwise, you won’t be able to see the list, as you can see below.
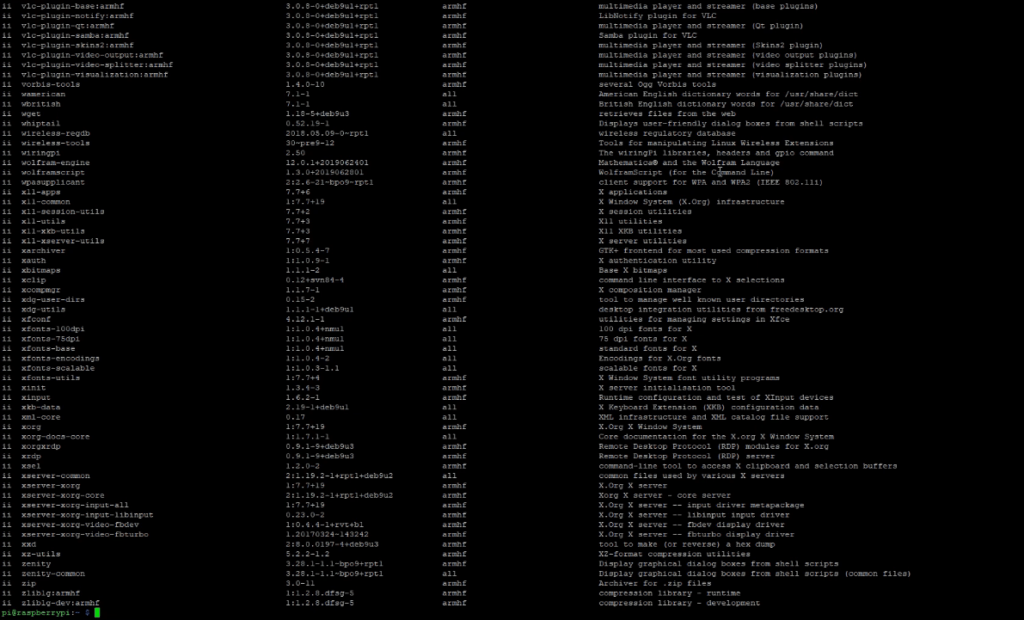
- Step 3: Once the list is in front of your screen, type the command “sudo apt-get –purge remove [app name]†and hit ‘Enter.’

So, it should be like this “sudo apt-get –purge remove plex. However, make sure to enter the right name of the app, as you can see in the list after performing Step 2.
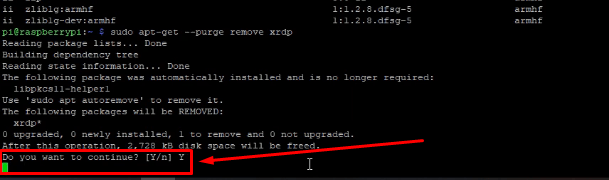
- Step 4: The command section will ask your permission to remove/uninstall the Plex app from Dietpi / RaspberryPi. So type ‘Y’ to confirm that you agree to eliminate the software and press ‘Enter.’
The program will take a few seconds to delete Plex, and once the process is complete, you will see the ‘Processing trigger for system’ command like this.Â
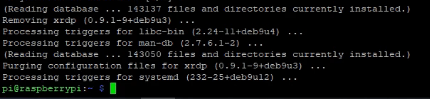
That means you have successfully uninstalled Plex from DietPi. So let’s move forward to install Plex again.
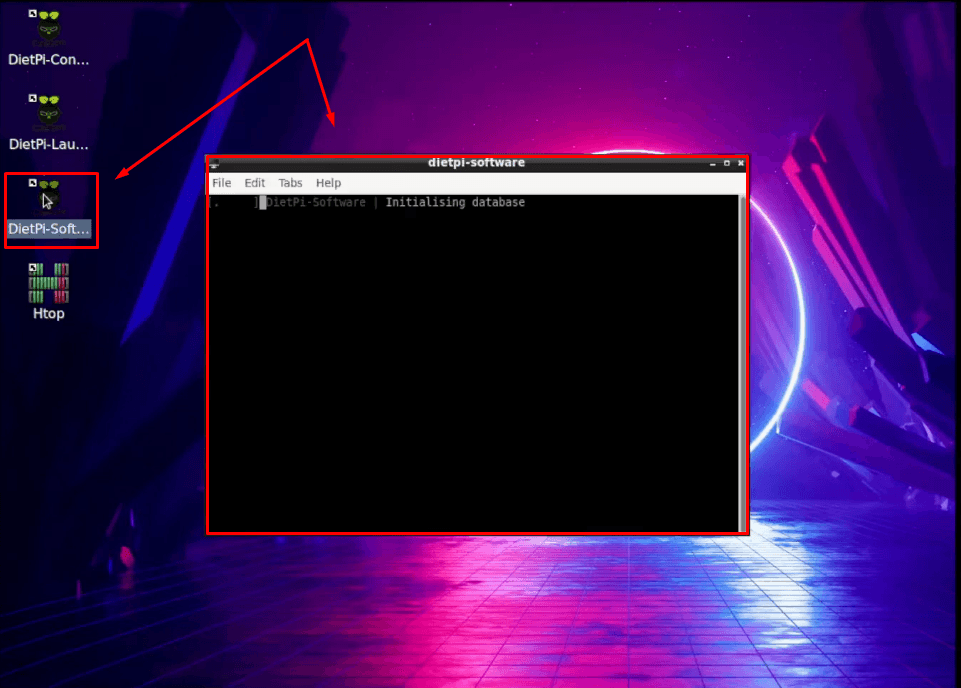
- Step 5: Click on the ‘DietPi Software’ icon on your desktop, and it will open the software menu window.Â
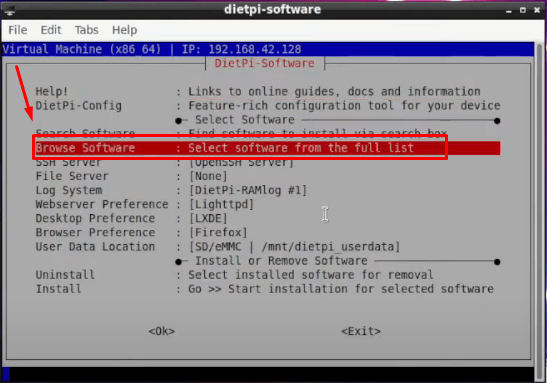
- Step 6: Select the ‘Browse Software’ option to see the entire list of available programs.
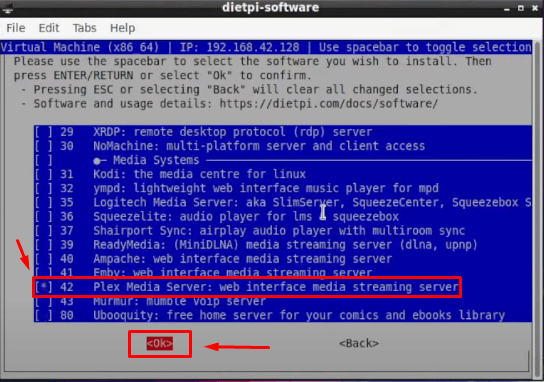
- Step 7: Scroll down to find the ‘Plex Media Server’ name in the list, select it, and click ‘Ok.’
- Step 8: As soon as you do that, you will return to the software window menu screen. If you already have DietPi installed without Raspberry, this is your chance to uninstall the program.Â
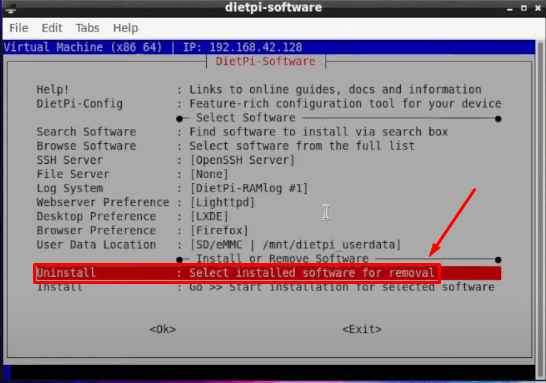
But, if you have already removed Plex, select ‘Install’ and click ‘Ok.’
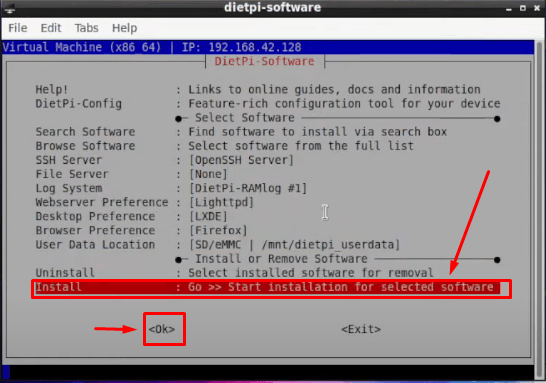
- Step 9: A new window will pop up, asking your permission to install Plex. So, hit ‘Ok’ again.
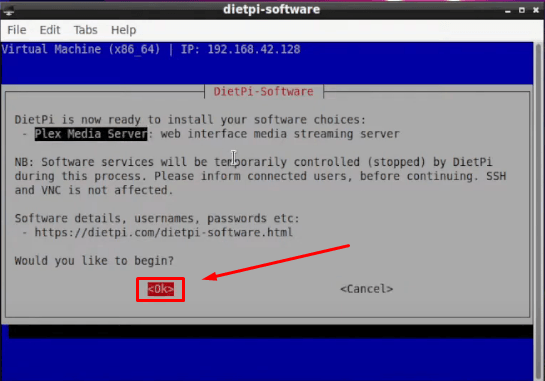
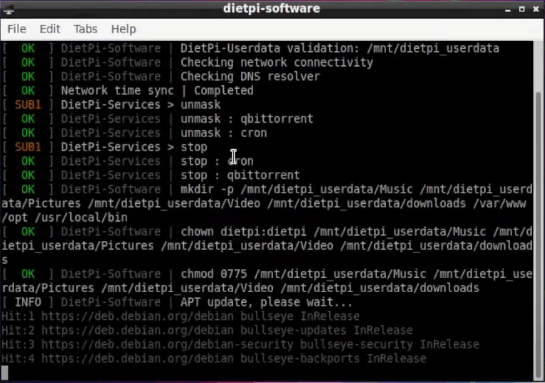
And wait for a few seconds until the process gets complete.Â
- Step 10: Now, go to your web browser and visit Dietpi’s software options. Then, type ‘Plex’ in the search bar on the site and click the ‘Plex Media Server’ option.
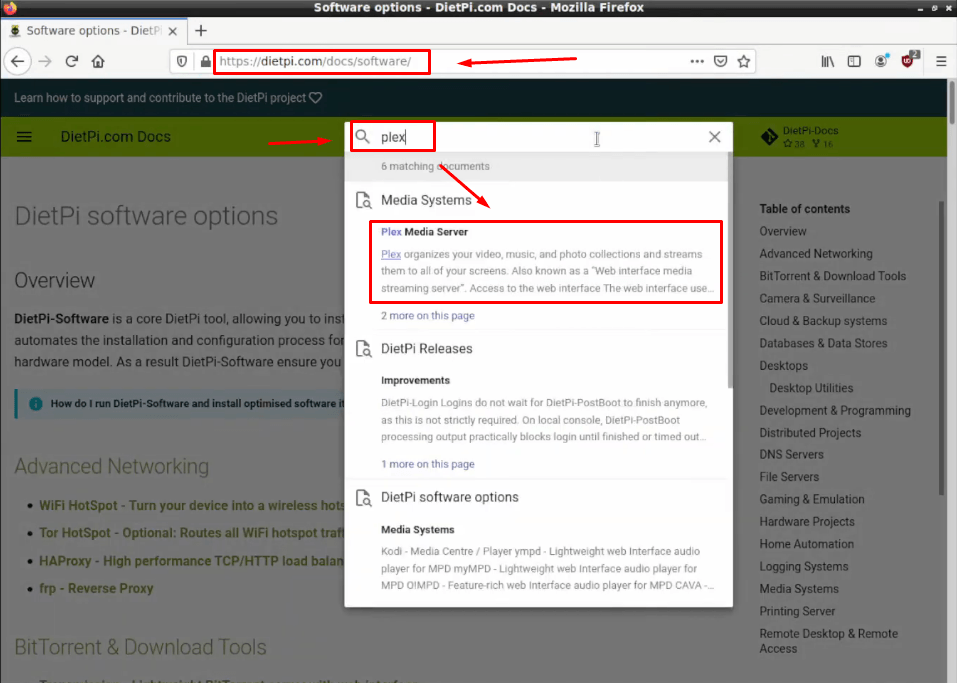
The next page will show you the port number like this.
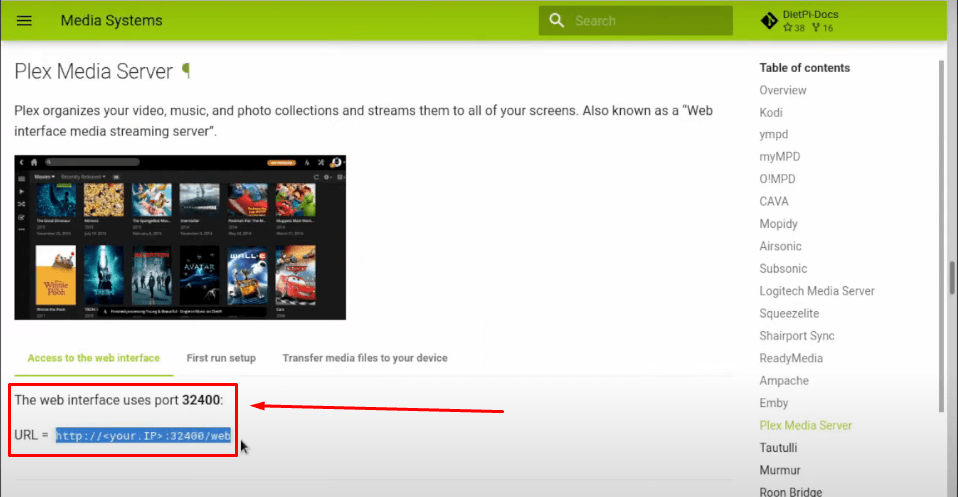
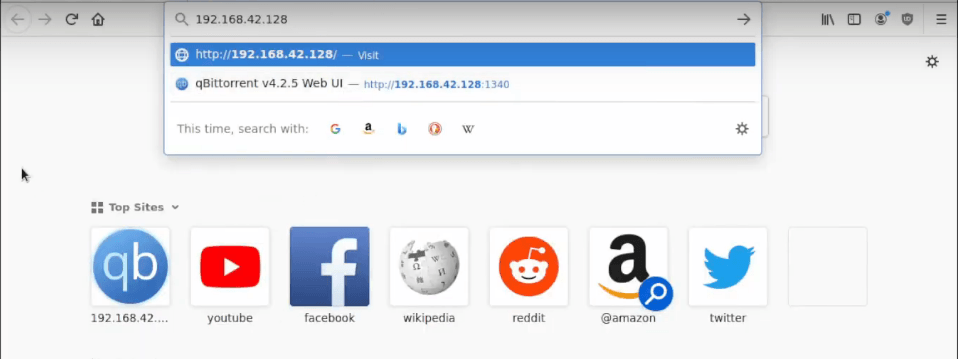
- Step 11: Next, open the DietPi configuration window, copy the IP address, and paste it into the search bar of your browser.

- Step 12: Copy and paste the port number (see Step 10) next to the IP address followed by ‘/web’ and hit ‘Enter.’ Here’s a screenshot.
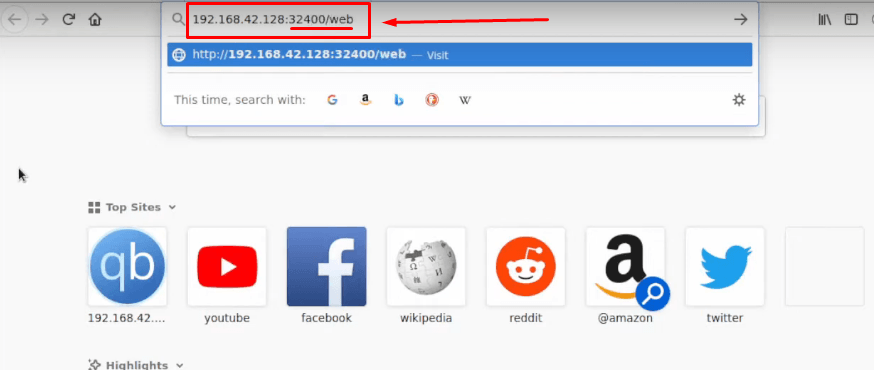
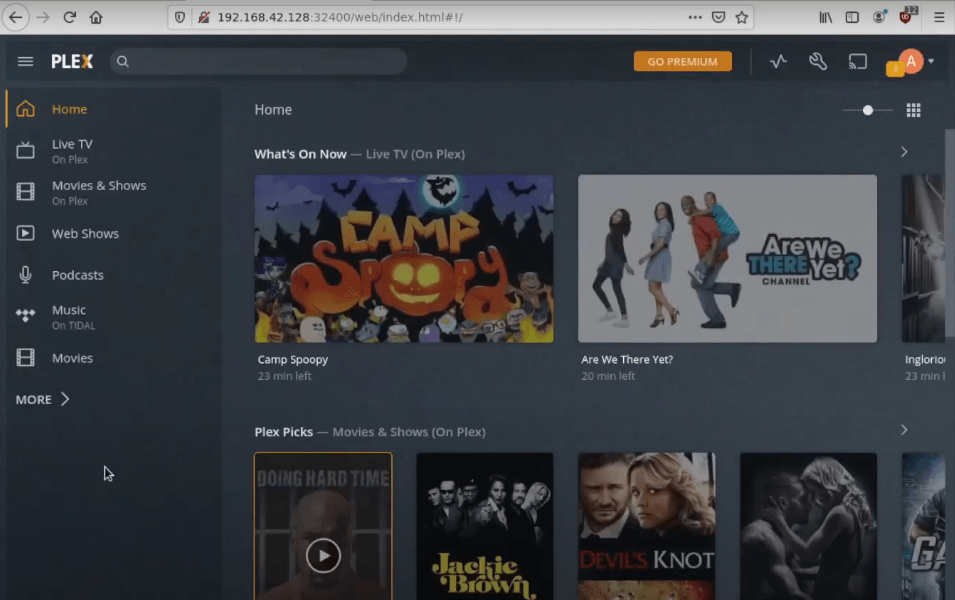
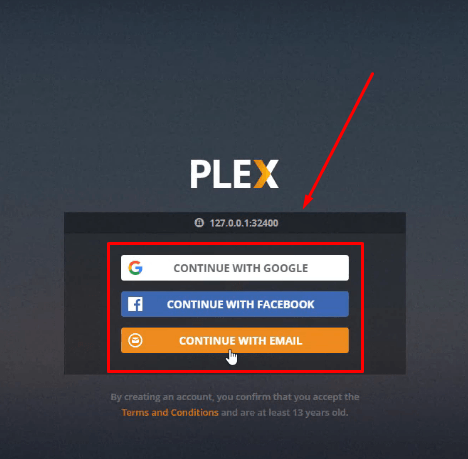
- Step 13: Doing so will take you to the Plex homepage. However, you will see a message that Plex does not host the application.
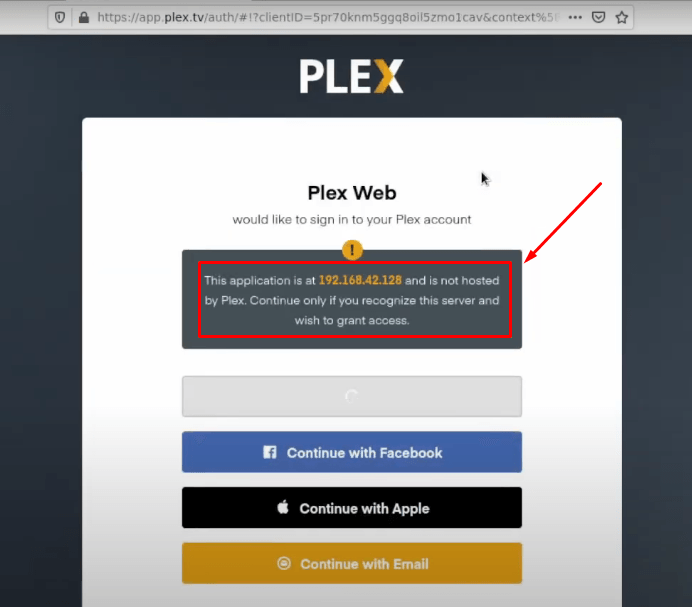
So, if you have already signed up, log in to your account using your email, Gmail, Apple ID, or Facebook.Â
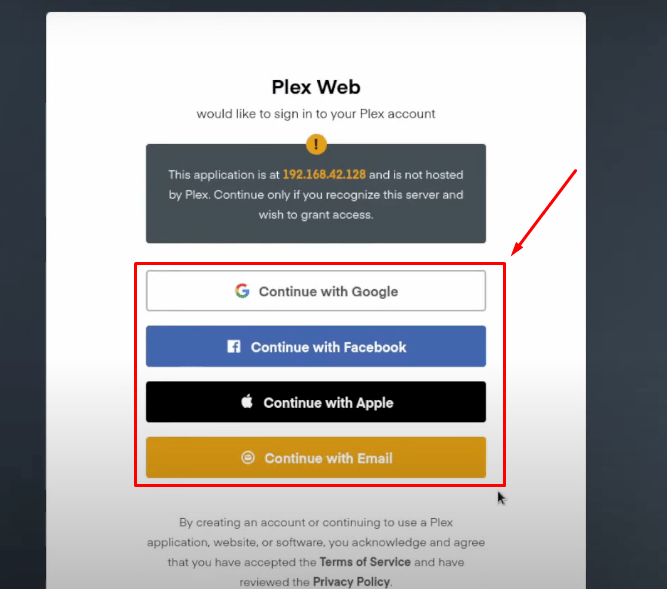
Otherwise, create an account and then log in.

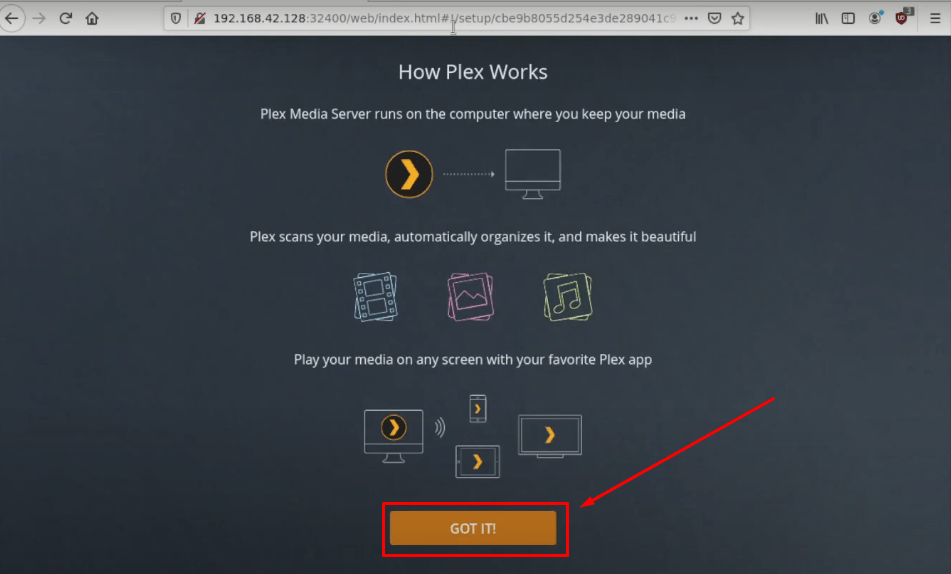
- Step 14: Once you’re logged in, click the ‘GOT IT’ button.Â
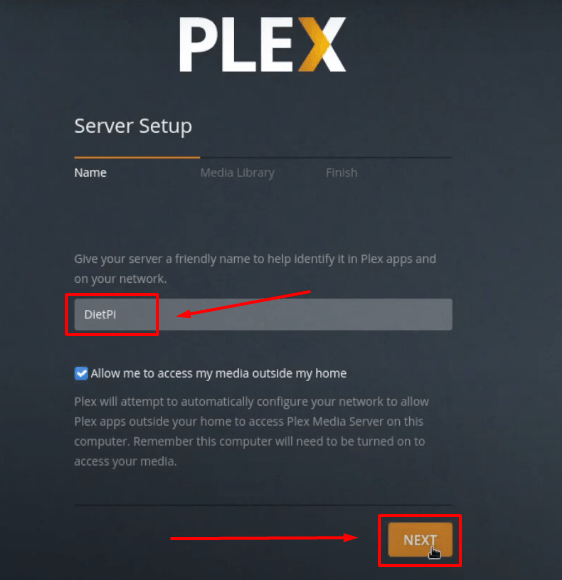
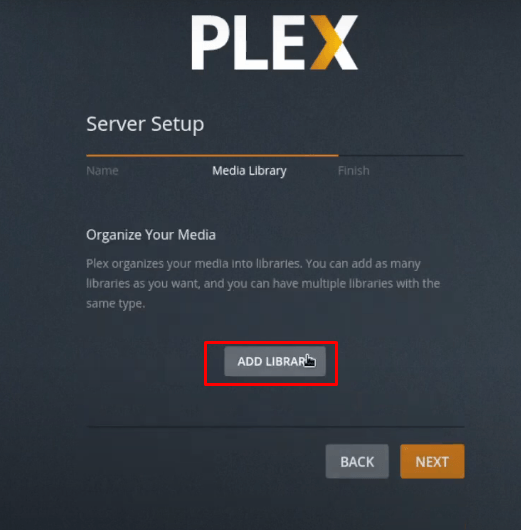
- Step 15: You will be taken to the ‘Server Setup’ page. Make sure that the server name is ‘DietPi’ and the ‘Allow me to access my media outside my home’ is checked. Then, click the ‘Next’ button.
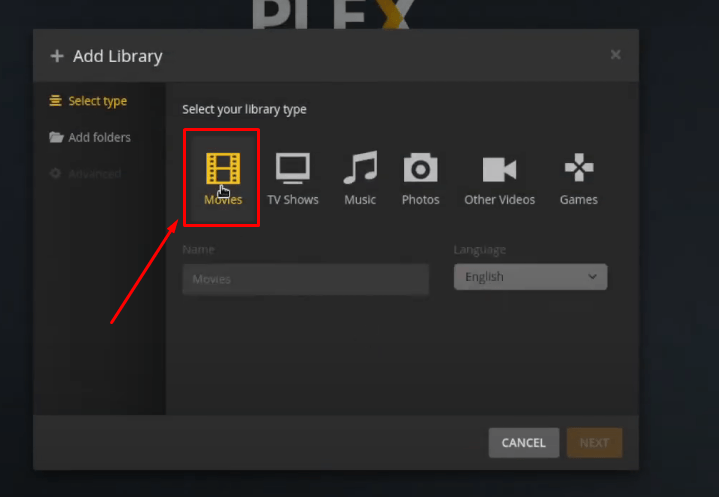
- Step 16: Select ‘Add Library’ and click the ‘Movies’ icon.
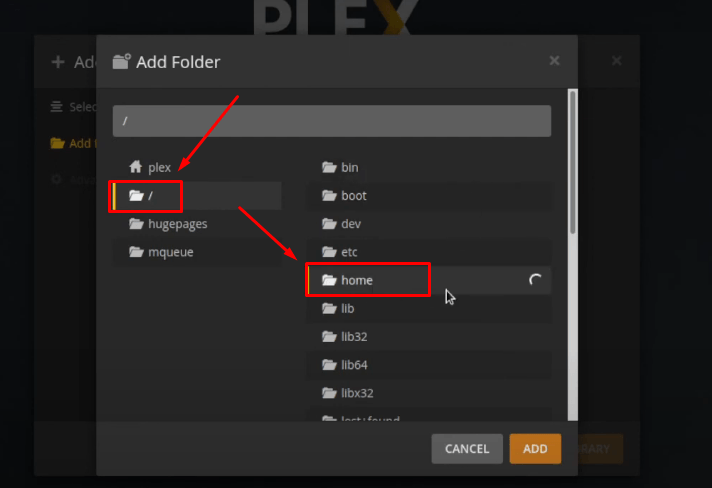
- Step 17: Click on the ‘Browse for Media Folder,’ select the ‘/’ folder and click ‘home’ folder.Â
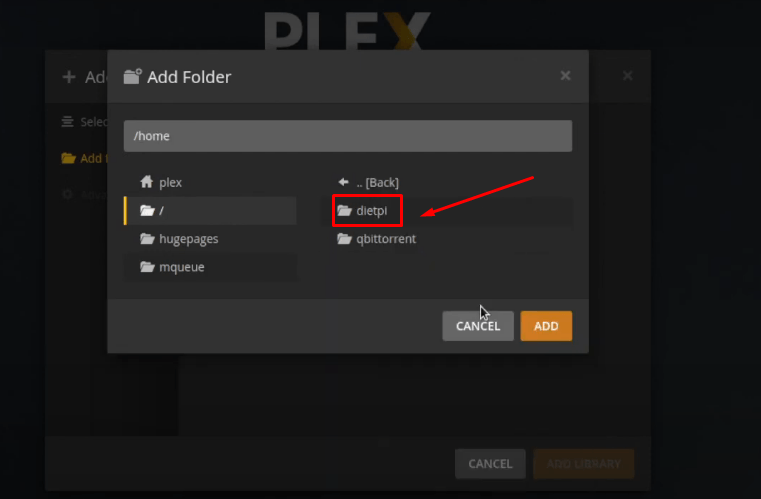
Step 18: Select the ‘dietpi’ folder and click the ‘Add’ button.Â
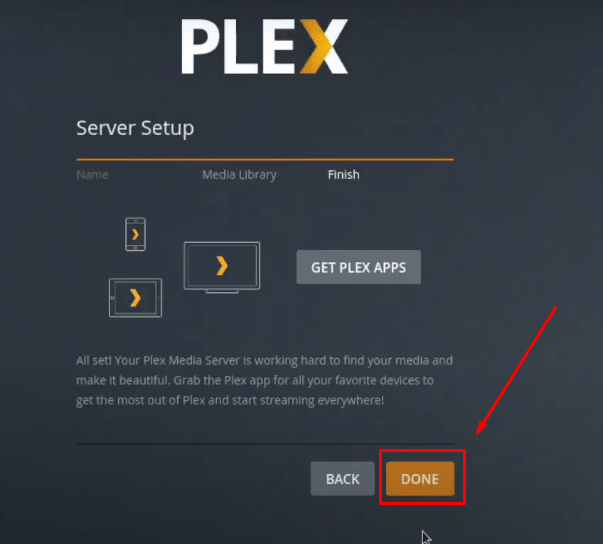
- Step 19: You will notice that the last step has taken you to the ‘Finish’ tab of the ‘Server Setup’ screen. So, click the ‘Done’ button and wait for Plex to load the movies. However, most of the time, the page gets stuck in the loading process. In that situation, refresh the page, and you will be able to see the media content.
- Step 20: Now, click any movie or show, and you will not see the “an error occurred loading items to play Plex†issue again.Â
Fix 2: Repair Your Corrupt Plex Database
Although this is a rare situation, it is quite possible that the database of your Plex has been corrupted. That’s why you are seeing the Plex playback error. There can be several reasons for that, such as shutting down your computer before closing the media server. In such scenarios, the database gets contaminated, and you see the “an error occurred loading items to play†on Plex.Â
So if you are using the 1.22.0 or 1.23.2 versions of Plex Media Server on Windows, Mac, or Linux, you can repair it by following the steps below.
However, it is always great to create a backup copy of the entire database file before proceeding with this tutorial. In most cases, you can restore the database copy that you backed with the help of a feature called ‘Scheduled Tasks.’
Typically, the database is located in the directory where you installed the Plex setup. For instance, /Plug-in Support/Databases/com.plexapp.plugins.library.db. But it also depends on your device and operating system. Therefore, the steps to repair the corrupt database of Plex are for the default directory location.Â
Moreover, the method for repairing the Plex database on Windows, Mac, and Linux are almost similar. You can also use these steps to eliminate this Plex playback error if you are using Unraid OS.Â
- Step 1: Download SQLite 3 on your computer.Â
- Step 2: Completely exit/quit your Plex Media Server. Then, open the ‘Command Prompt’ (Windows users) or ‘Terminal’ (Mac and Linux users) dialog box on your computer.Â
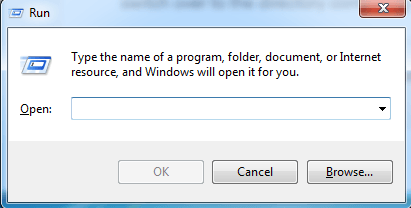
Press “Windows Key + R†on Windows OS and ‘Ctrl + Alt + T’ on Linux/Unraid to open the command prompt/terminal.Â
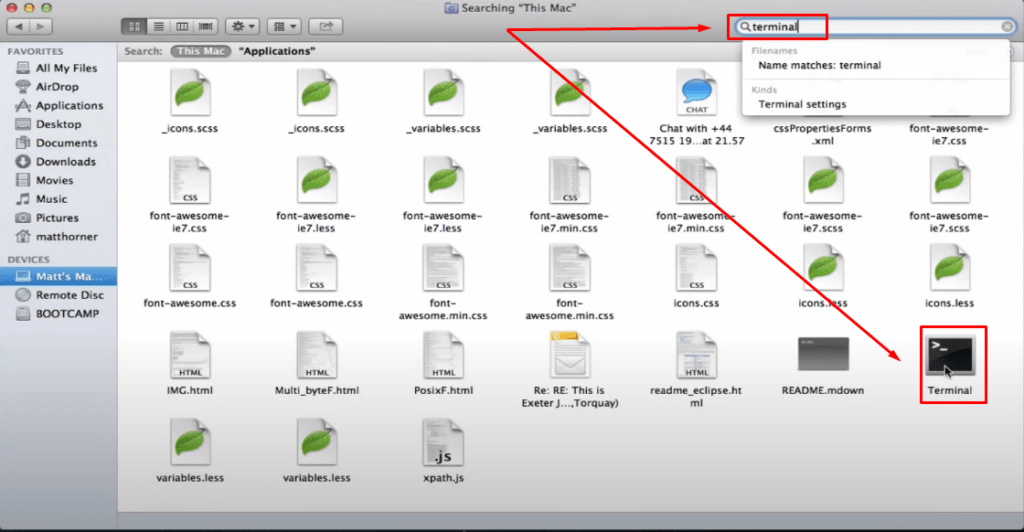
If you are a Mac user, go to ‘Finder,’ open ‘Applications,’ type ‘Terminal’ in the search bar, and click the icon.Â
Also, you need to make sure that you run commands in quotes to take care of the spaces between the paths.Â
- Step 3: In the command prompt and type the following commands.Â
On Windows: First type ‘cmd’ and then this command: cd “%LOCALAPPDATA%\Plex Media Server\Plug-in Support\ Databasesâ€
On Mac: Open the terminal and type this command: cd ~/Library/Application\ Support/Plex\ Media\ Server/Plug-in\ Support/Databases/
On Linux/Unraid: Open the terminal and write this command: cd $PLEX_HOME/Library/Application\ Support/Plex\ Media\ Server/Plug-in\ Support/Databases/
- Step 4 (To Check Corruption): You first need to run commands to check to what extent the database is corrupt. Even if you see ‘OK’ as a result of the commands, it is possible that the database still has issues. So enter the following commands one by one.
- copy com.plexapp.plugins.library.db com.plexapp.plugins.library.db.original
- sqlite3 com.plexapp.plugins.library.db “DROP index ‘index_title_sort_naturalsort’â€
- sqlite3 com.plexapp.plugins.library.db “DELETE from schema_migrations where version=‘20180501000000’â€
- sqlite3 com.plexapp.plugins.library.db “PRAGMA integrity_checkâ€
- Step 5 (For Repairing Database): Even if there are no errors shown in the previous step, you still need to run the repair. To do that, open your command prompt or terminal and add the following commands afterÂ
- copy com.plexapp.plugins.library.db com.plexapp.plugins.library.db.original
- sqlite3 com.plexapp.plugins.library.db “DROP index ‘index_title_sort_naturalsort’â€
- sqlite3 com.plexapp.plugins.library.db “DELETE from schema_migrations where version=‘20180501000000’â€
- sqlite3 com.plexapp.plugins.library.db .dump > dump.sql
- del com.plexapp.plugins.library.db
- sqlite3 com.plexapp.plugins.library.db < dump.sql
Important: If you are entering these commands on Linux to repair Plex’s database, you will need to add a 7th command: chown plex:plex com.plexapp.plugins.library.dbÂ
- Step 6: Backup or delete the following files, or move them elsewhere if you find them with the original database.Â
- com.plexapp.plugins.library.db-wal
- com.plexapp.plugins.library.db-shm
- Step 7: Restart your Plex Media Server and play the content. If you have followed all the steps correctly, then you won’t see the “an error occurred loading items to play†on Plex again.Â
Note: You must enter all the commands as they are demonstrated in this article. These commands will not work in case of any misspelling, misspacing, or incorrect symbols and characters.Â
Fix 3: Change Directories Names to Standard Plex Paths
Sometimes you see the “an occurred loading items to play†on your Plex due to the changed directories. In other words, when you make a custom directory or folder to add media, such as music, movies, shows, or more, Plex causes this playback error.Â
Therefore, if you have recently renamed a directory/library, it is advised to change its name to default paths like /shows /movies, etc. So here’s what you need to do.
- Step 1: Open your Plex and let it load the items. Do not play any content at this moment.Â
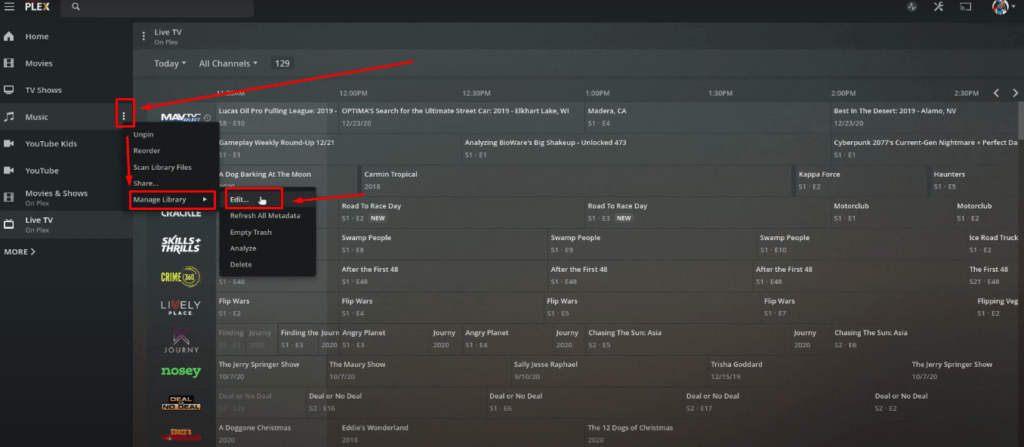
- Step 2: Go to the left side of the screen and click on the media type. This can be ‘Music,’ ‘TV Shows,’ or ‘Movies.’
- Step 3: Now click the three dots next to the media type to open the menu. From there, navigate to ‘Manage Library’ and click ‘Edit.’
- Step 4: Remember, you need to rename the folders/directories to the standard Plex names, such as Movies, TV Shows, Music, etc. For example, if currently, you have renamed the ‘Music’ library to something else, you should immediately change it to the default path.Â
To do that, click on the ‘General’ tab and change the name to the actual name given by Plex.
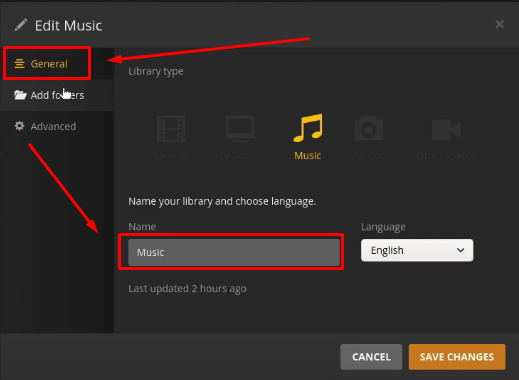
- Step 5: Click ‘Save Changes’ and wait a few seconds to let Plex absorb the updated information. Restart the program and play the media; the playback error shouldn’t reappear.Â
Fix 4: Check Your TIDAL Subscription if Linked to Plex
If you have an existing TIDAL subscription and you are using the service through Plex, then this solution is for you. Many users have complained about seeing the playback error (an error occurred loading items to play) on Plex when trying to play the podcast or music using TIDAL.Â
So, if you are one of them, you must check whether your TIDAL account is valid. Because in most cases, either there’s a problem with subscription renewal or an issue with account linking that causes this problem for TIDAL/Plex users.
So, first, you need to check if you have linked the account correctly. Second, you must ensure your TIDAL subscription is billed through Plex.Â
- Step 1: Visit Plex and sign in.
- Step 2: Go to your ‘Account Page’ from Plex’s web app.
- Step 3: Select the ‘Other Services’ option.
- Step 4: Relink your TIDAL account.
- Step 5: Restart the Plex Media Server and play TIDAL content through Plex. This should resolve the playback problem. If the problem still exists, follow the next step.
- Step 6: Go to your ‘Subscriptions’ page on Plex.Â
- Step 7: Edit the billing information and save the changes.
- Step 8: Restart Plex and play the podcast or track on Plex from the TIDAL menu. The error should be fixed by now.Â
Fix 5: Move Your Media to Another Computer
This solution is for Windows users having Plex Server Media with difficulty playing the content due to the playback error. The method teaches you to move or migrate your media from the existing computer (source) to another computer (destination). If you do it correctly, you won’t see an error occurred loading items to play Plex warning prompt again.
However, you must be very picky about the new device if you want to transfer the media. According to the Plex guidelines, your computer should have 1500 to 2000 PassMark. It is compulsory to run your files in 1080p and 720p resolution with an internet speed of 10Mbps and 4Mbps.Â
Note: If you are using Kodi with Plex Add-on to stream media on a TV, the internet speed requirements will be different.Â
It is a bit tricky process, but by following these steps, as mentioned, you can complete it successfully. So here it goes.
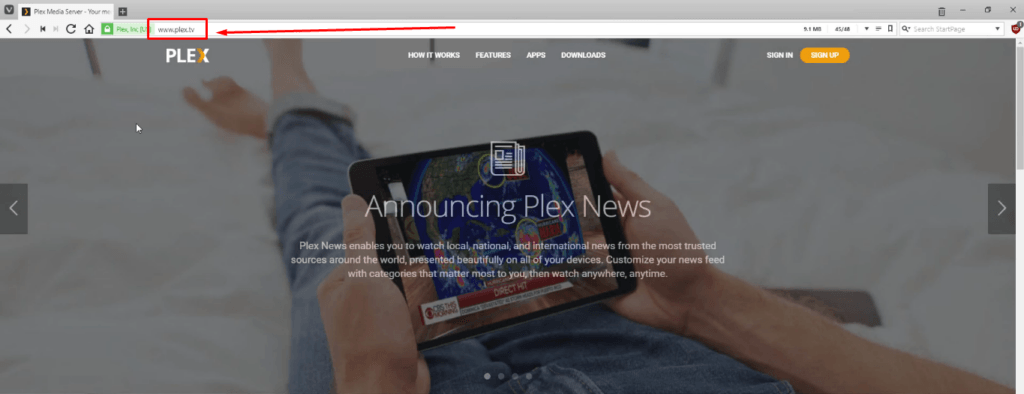
- Step 1: Go to the Plex website from your destination computer.
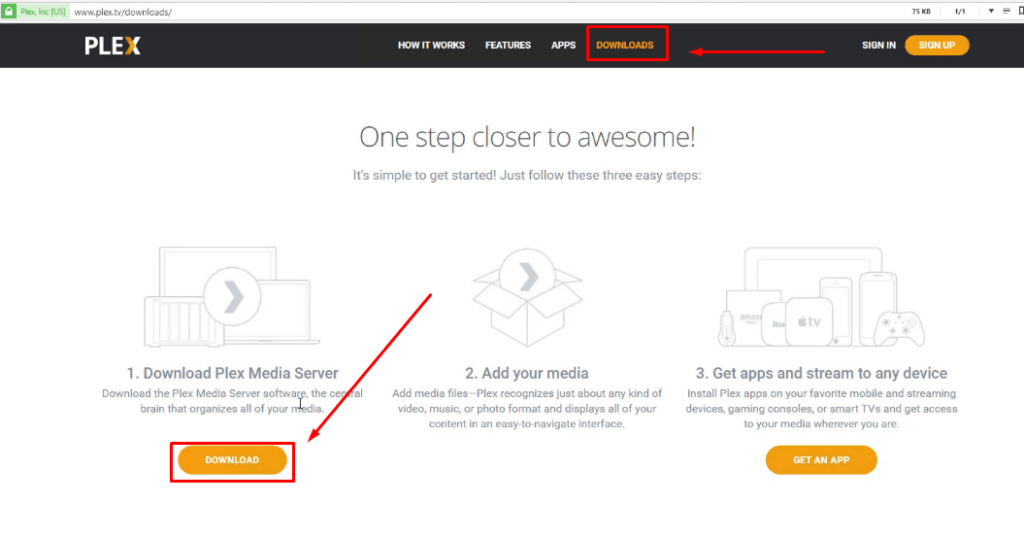
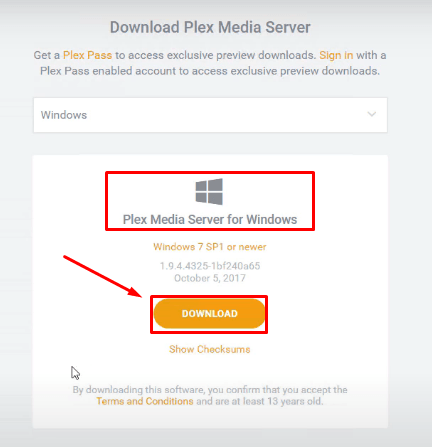
- Step 2: Click the ‘Downloads’ tab, then click the ‘Download’ button under the “1. Download Plex Media Server†heading.
- Step 3: As soon as you do that, it will open a window confirming that you are about to save the Plex Media Server setup for your Windows device. So click the ‘Download’ button again.
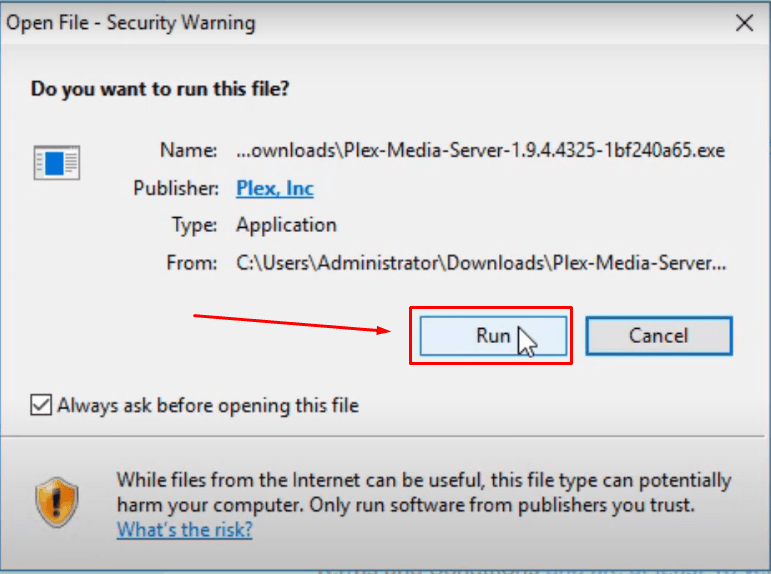
- Step 4: Choose ‘Open.’

And after the file is downloaded, click ‘Run’ to launch the installer.Â
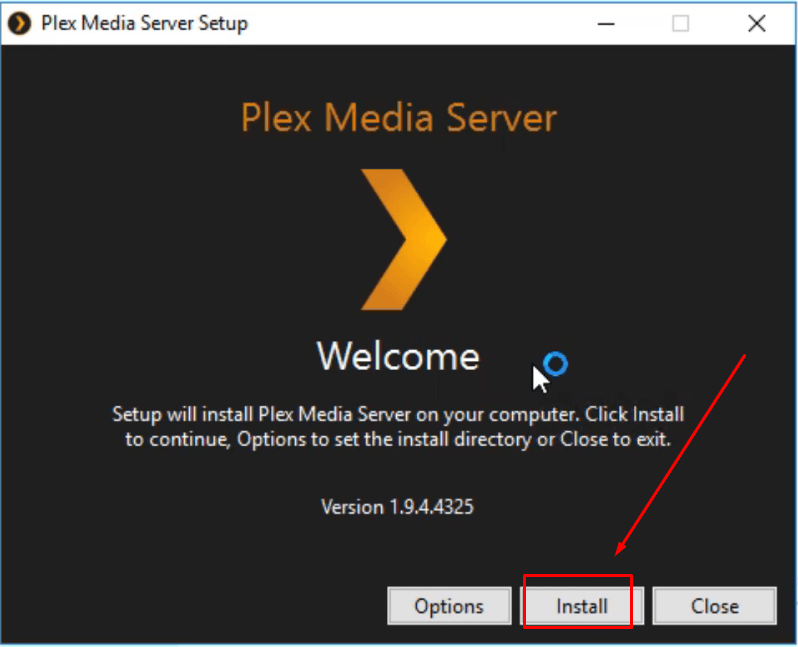
- Step 5: Click on the ‘Install’ button and wait for the installation process to be completed.
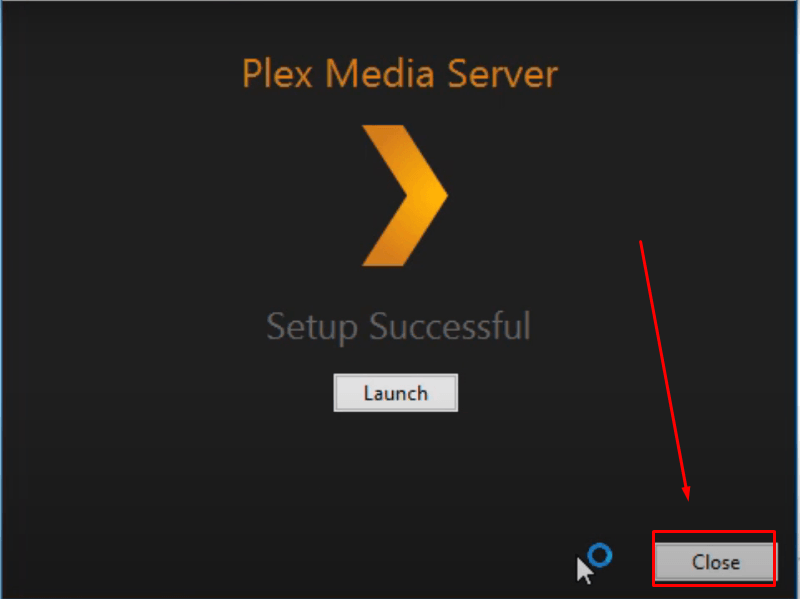
- Step 6: You will see a window confirming the successful setup. However, at this point, do not ‘Launch’ the Plex Media Server and click ‘Close’ instead.Â
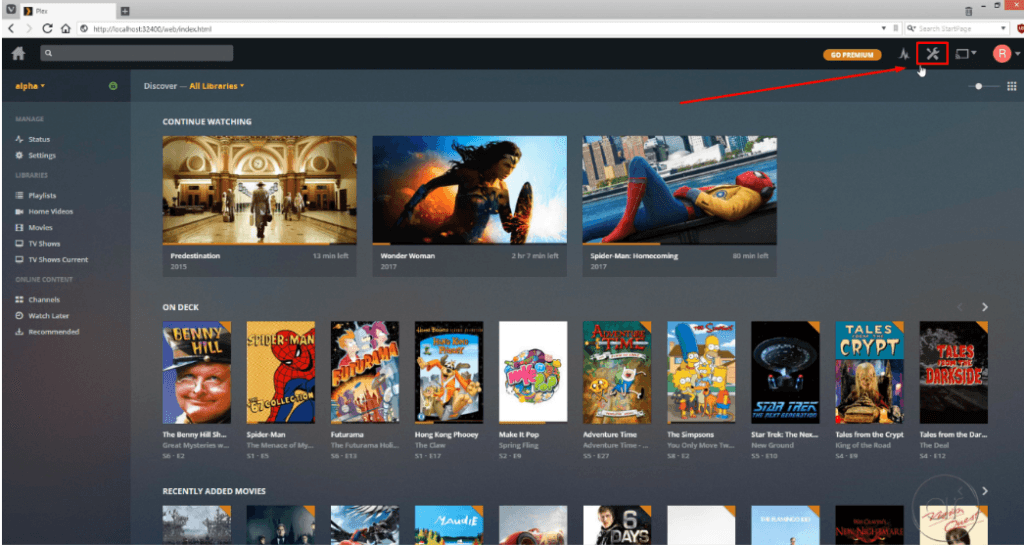
- Step 7: Go back to your source computer that is showing a Plex error occurred loading items to play. Log in to your Plex account in case you signed out previously, and click on the ‘Settings’ icon.
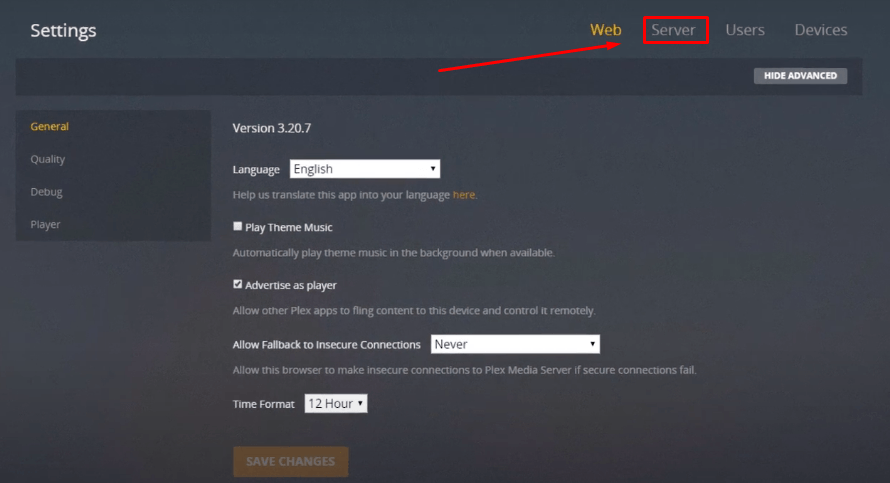
- Step 8: Choose the ‘Server’ tab from the top-right menu of the screen.
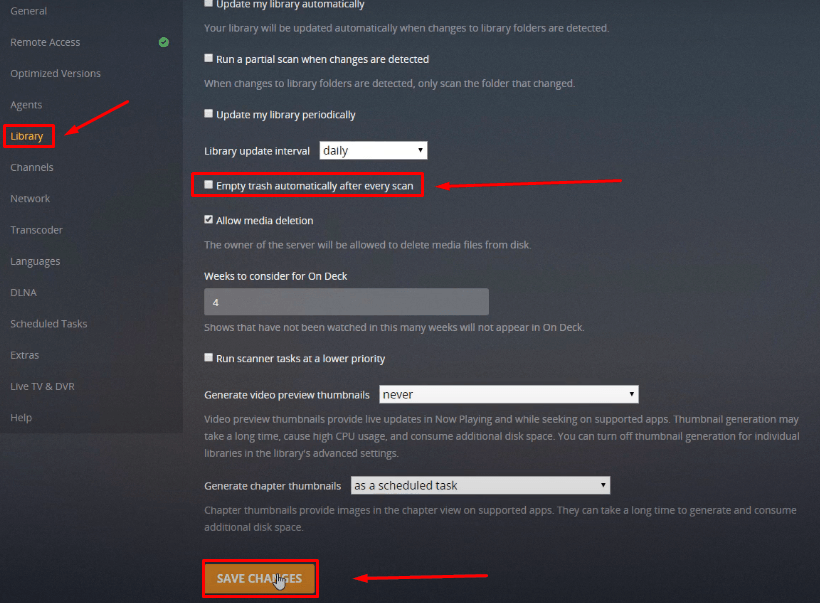
- Step 9: Choose ‘Library’ from the left-corner menu and uncheck the ‘Empty trash automatically after every scan’ option. And then, hit the ‘Save Changes’ button.Â
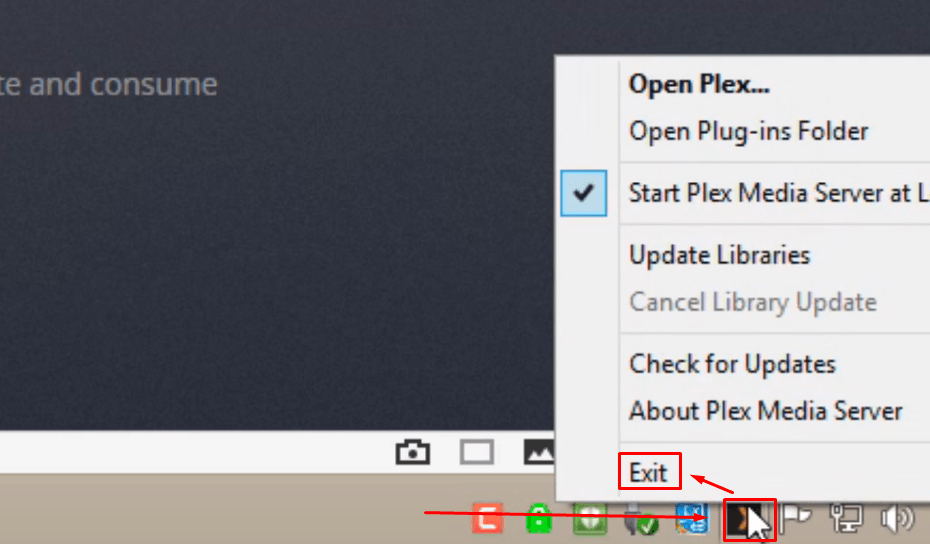
- Step 10: Look at your notification tray at the right-bottom of your screen. Right-click on the Plex icon and make sure to ‘Exit.’
Keep in mind that you need to transfer the Plex Media Server files in Zipped format and the registry file to transfer from your source computer to the destination computer.
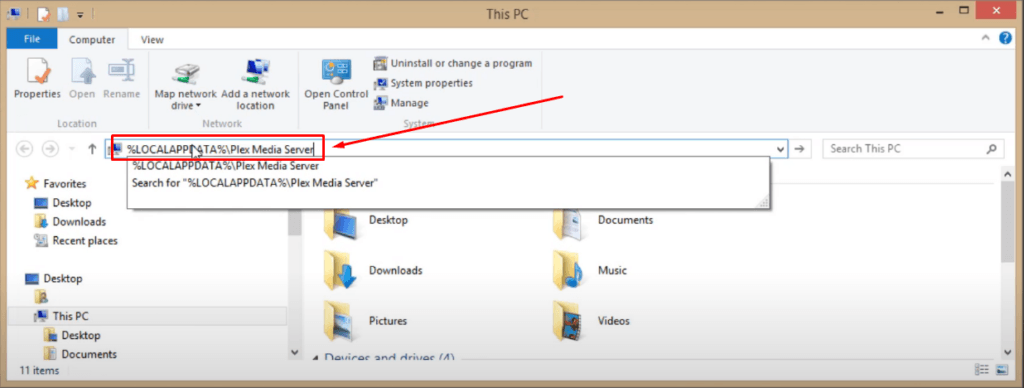
- Step 11: So open your ‘This PC’ folder and type “%LOCALAPPDATA%\Plex Media Server†to let the system take you to Plex’s folder in your computer.
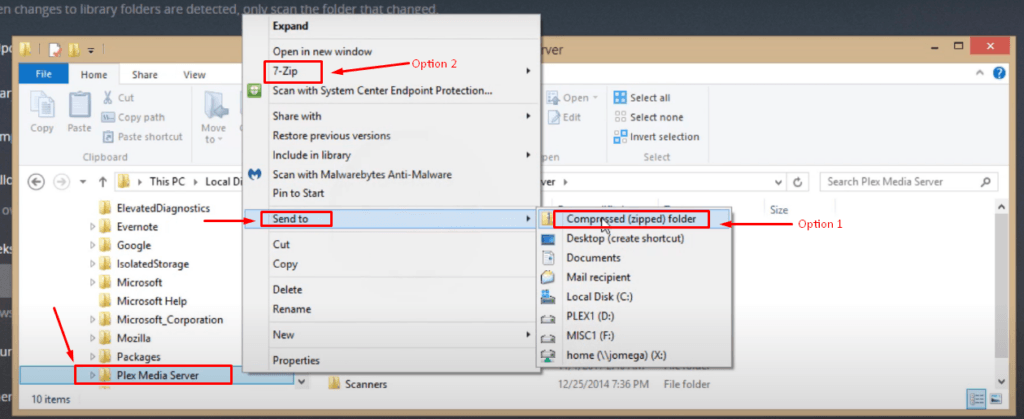
- Step 12: From the folders on the left side, right-click on the ‘Plex Media Server’ folder to compress it entirely. You can use the default compressor tool available in Windows (Option 1) or the 7-Zip software (Option 2) to compress files. 7-Zip is used for this tutorial.Â
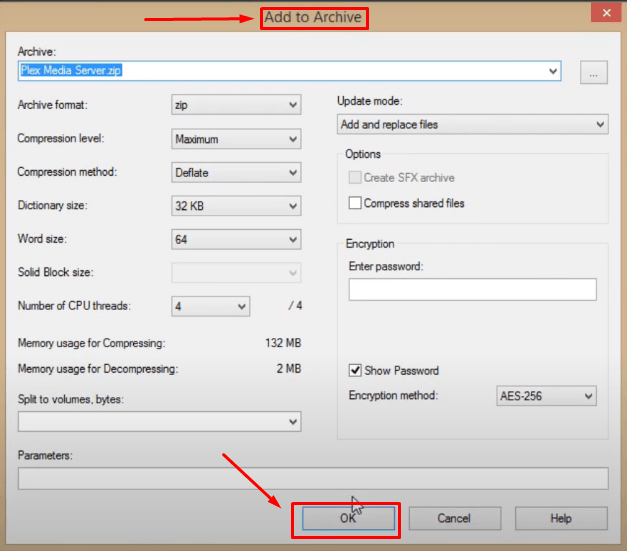
- Step 13: Assuming you are also compressing files through 7-Zip, add the Plex Media Server to Archive and click ‘OK.’Â
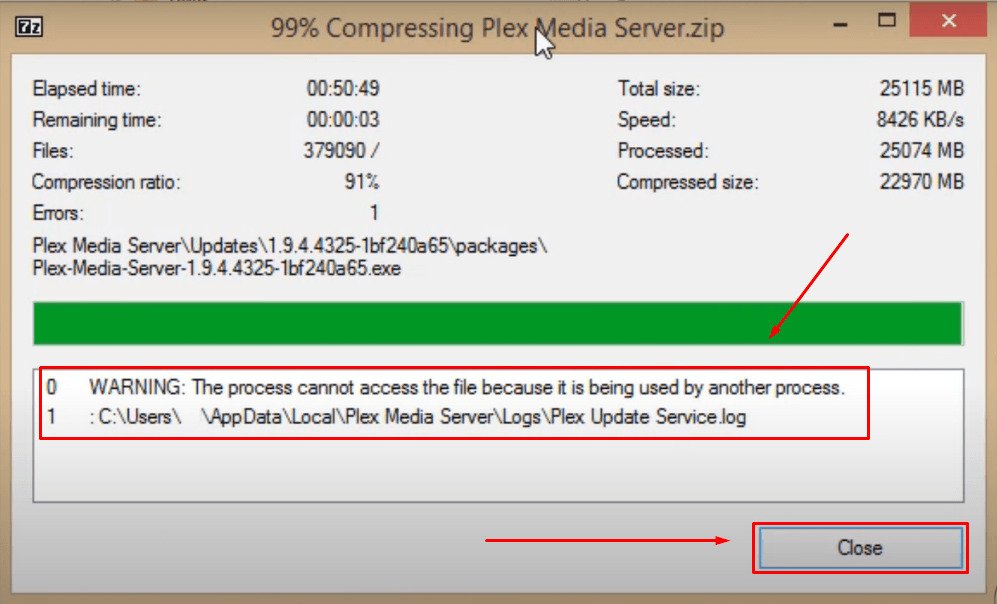
The compressing process will take some time, depending on the contents of your folder.
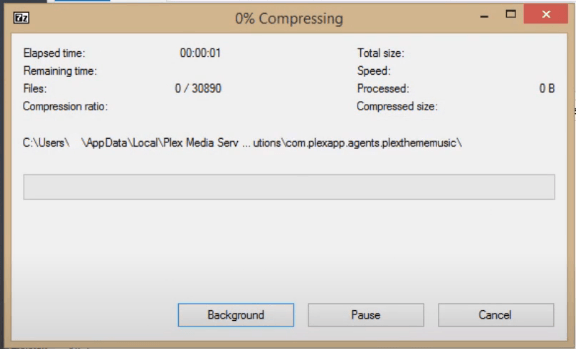
Besides, you may see a warning message when compressing reaches to 90% ratio. Don’t get panic because that’s a normal message. So click the ‘Close’ button and continue with the other steps.
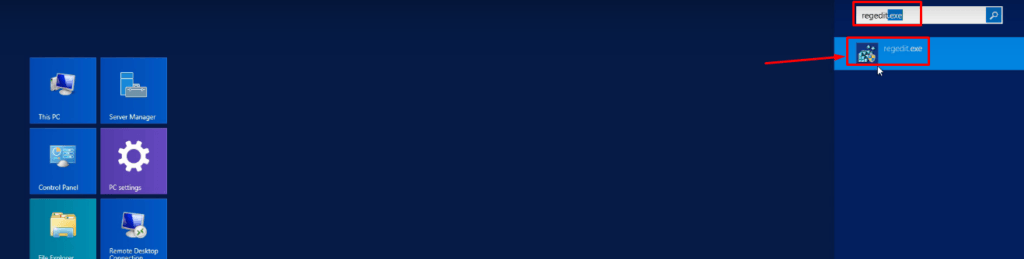
- Step 14: Once the folder is compressed, open the ‘Start’ menu and type “regedit.exe,†and click on its icon.Â
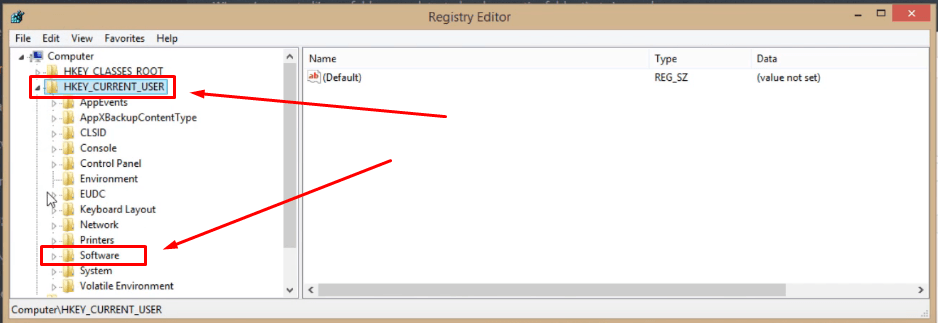
- Step 15: Again, you will see different folders on the left side of the screen. From there, click to open the ‘HKEY_CURRENT_USER’ folder. Then, click on the ‘Software’ folder to view its contents.Â
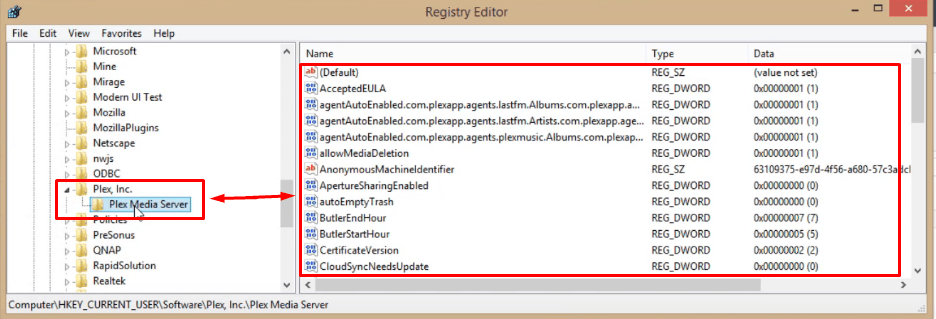
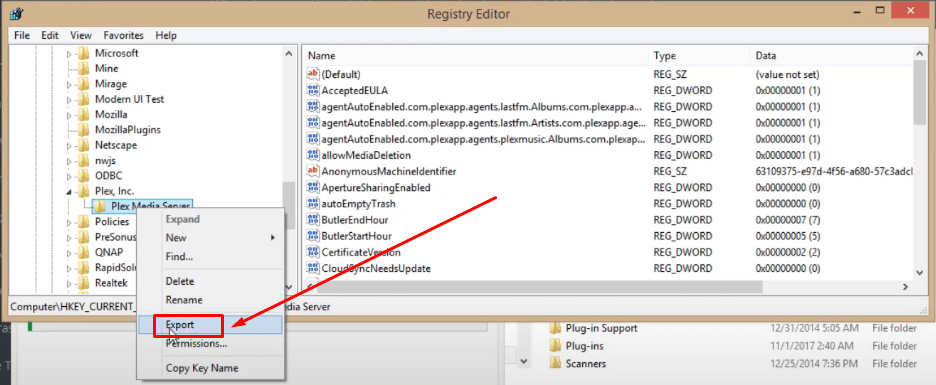
- Step 16: Click the ‘Plex, Inc.’ folder inside the ‘Software’ folder and click the ‘Plex Media Server’ folder. Doing so will help you view the contents inside this folder on the right side of the screen.Â
- Step 17: Now, right-click on the ‘Plex Media Server’ folder and select ‘Export.’
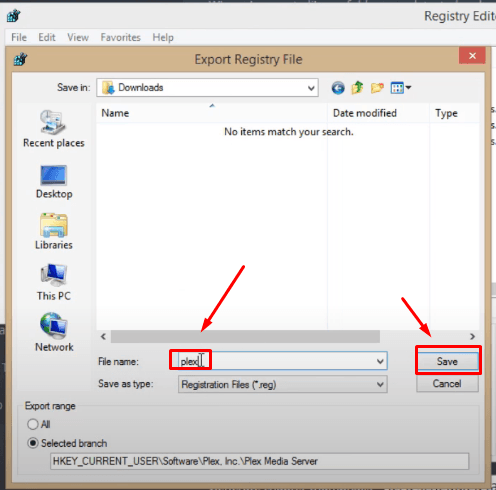
- Step 18: Name the registry file and click the ‘Save’ button. Make sure you remember the location of this registry because you need it later.Â
- Step 19: Go back to the destination computer and transfer the zip folder and registry file from the source computer. You can use any medium, like a USB, to transfer the contents.
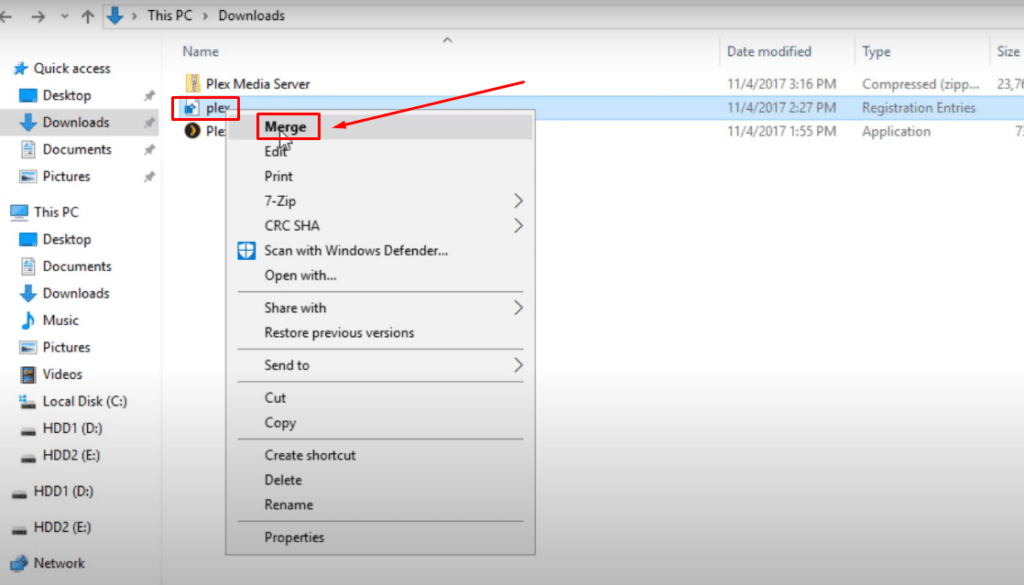
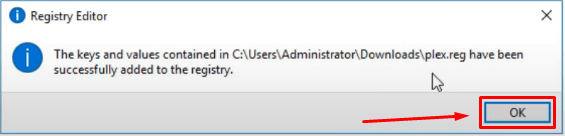
- Step 20: In your destination computer, right-click on the plex registry file and choose ‘Merge.’
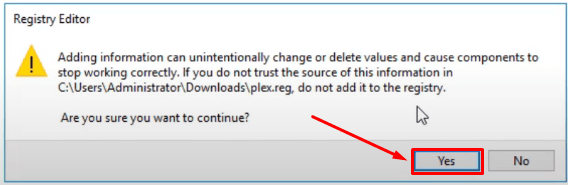
A Register Editor warning message will pop up, so click ‘Yes’ and then the ‘OK’ button, as shown in the screenshots below. This will enter this Plex registry to the destination computer’s registry.
- Step 21: The next step is to unzip the ‘Plex Media Server’ in the destination PC. To do that, right-click on the ‘Plex Media Server’ folder and select ‘Cut’ from the menu.

- Step 22: Type the directory name ‘%LOCALAPPDATA%’ in the folder’s search bar to open the local PC directory.Â
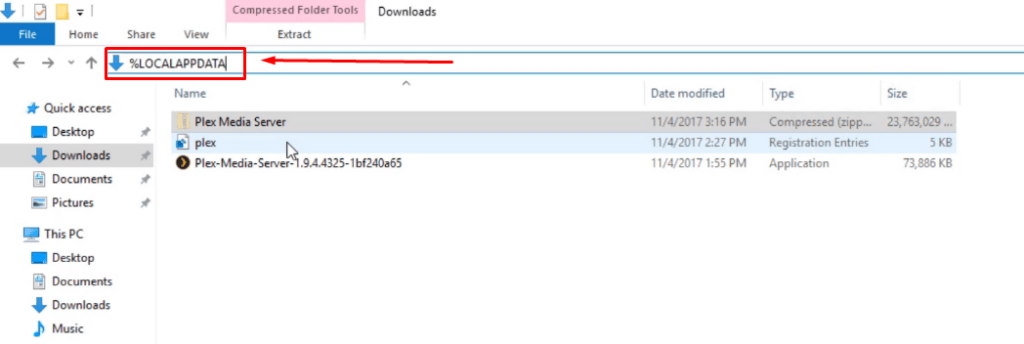
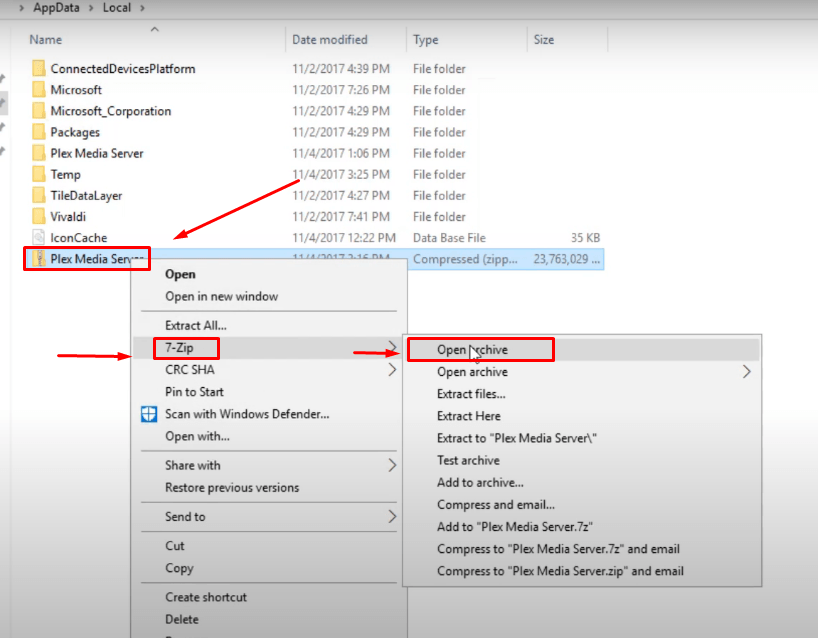
- Step 23: Paste the zipped version of the ‘Plex Media Server’ folder here. Then right-click on it, navigate to 7-Zip, and click the ‘Open archive’ option.
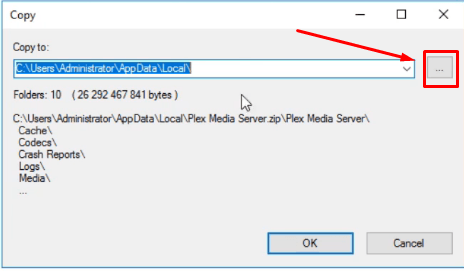
- Step 24: Select all the folders and click the ‘Extract’ button in the top bar menu.
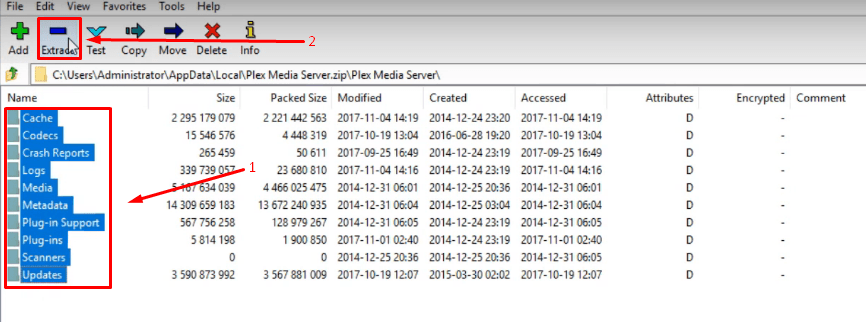
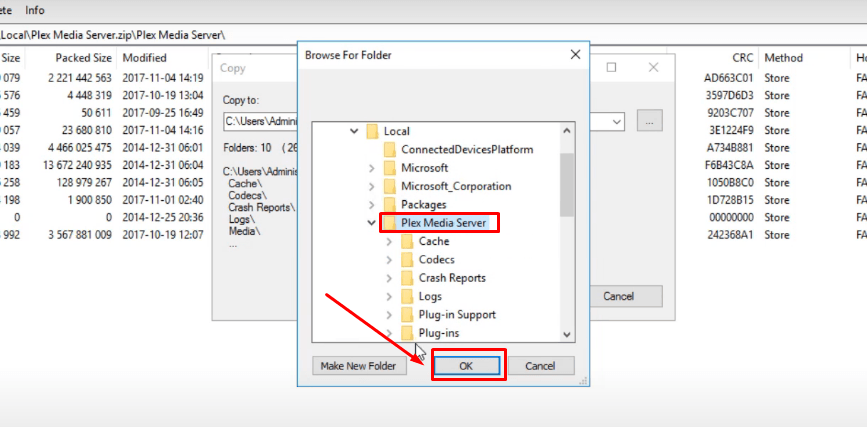
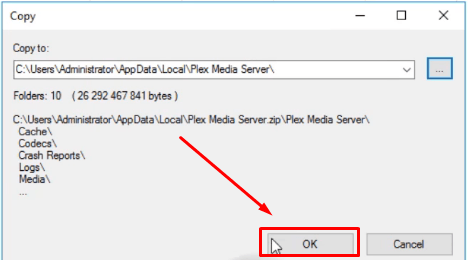
- Step 25: Click the three dots (…) button, select the ‘Plex Media Server’ folder, and click the ‘OK’ button. Now, again click the ‘OK’ button when the three dots prompt appears.
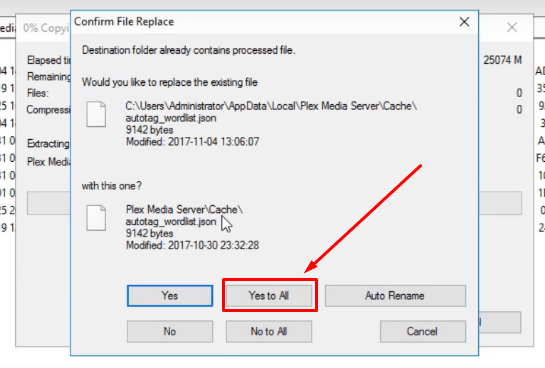
- Step 26: You will see another message box that will ask for your confirmation to replace files. So click the ‘Yes to All’ button.Â
Once it’s done, restart your computer.
- Step 27: Go to start and open the Plex Media Server. Then, double-click the ‘Plex’ icon on the notification tray at the bottom of your screen to open Plex in your PC’s browser.
- Step 28: Sign in with the same Plex account. You will notice that all the content that you see on the source computer is now available on the destination computer. However, do not click to play any media content at this stage. Otherwise, you will see the “an error occurred loading items to play†in your Plex again.Â

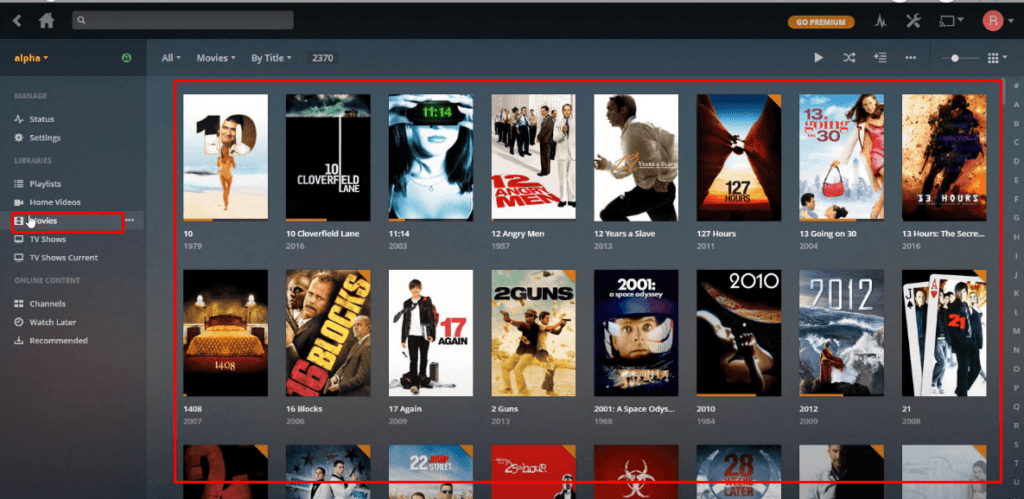
- Step 29: Click on any one of the libraries, such as ‘Movies,’ to confirm none of the titles are missing.Â
- Step 30: Then, click on the ‘Settings’ icon.Â
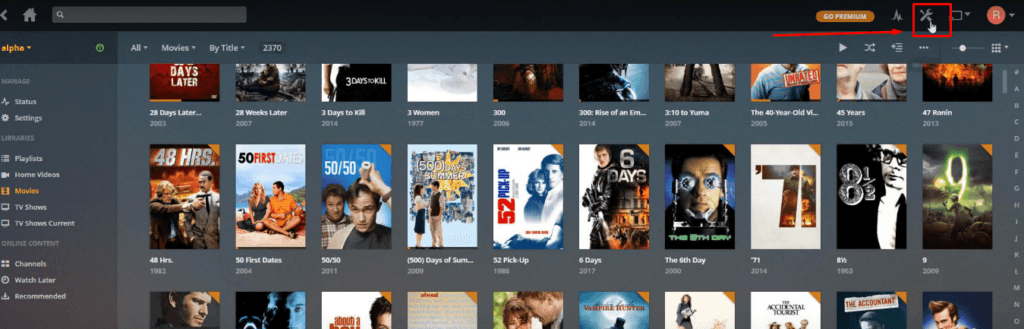
Choose the ‘Server’ tab and click on the ‘Sign Out’ button.
