Therefore, it is called rotten cow, because the iron core uses the selected second-hand iron core. The cost of all materials is less than 100 yuan, and the equipment is also behind. A manual winding machine of less than 30 yuan is also relatively primitive and traditional. But the price theory, the price is not bad, the effect is not good, but also to go, can meet the requirements of the general audience, so the finishing paste, in order to help the students into the gallbladder.
1, do wire frame, 0.4mm elastic paper two layers, see Figure 1;
Alt="Butterfly output transformer production diagram" 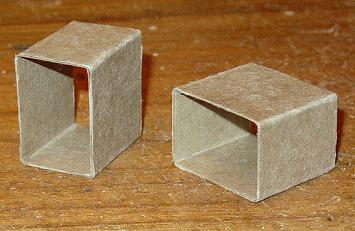
Figure 1 is made of wireframe
2, wire frame insulation, winding 0.08 cable paper and 0.12 yellow wax each layer, stick with only tape, see Figure 2; 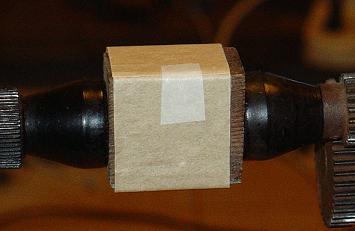
Figure 2 wireframe plus insulation paper
3. Wrap the primary enameled wire end with 0.08 cable paper, and fold the outlet end (to prevent the wire from pulling out when the first few turns), stick with paper tape, see Figure 3; 
Figure 3 lead wire head
4, around the first section of the primary coil, when the coil is pressed against the wire head and the paper frame insulation layer, tear off the paper tape, see Figure 4; 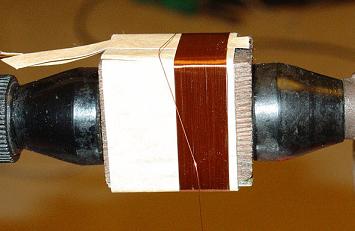
Figure 4 Primary winding
5. After winding a layer, stick the end of the wire with paper tape, and stick the anti-collapse protection edge with a narrow tape cut with a cowhide sealing tape at both ends of the coil, as shown in Figure 5; 
Figure 5 plus anti-collapse
6. Add a layer of 0.05 telephone paper between layers. When adding paper, first cut a gap in the position of the insulating paper, and pull the enameled wire through the gap to the beginning of the upper layer. After sticking the insulation layer with paper tape, Cut a gap in the position of the insulation paper at the end, and lead the enameled wire around the next layer. This is the so-called Z-winding method. See Figure 6, Figure 7, Figure 16 - Figure 18; 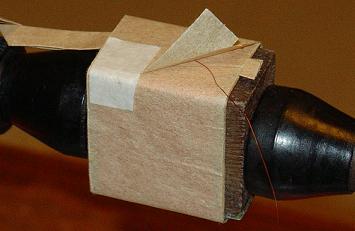
Figure 6 plus interlayer insulation paper 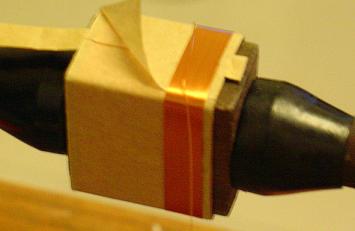
Figure 7 Z-winding method 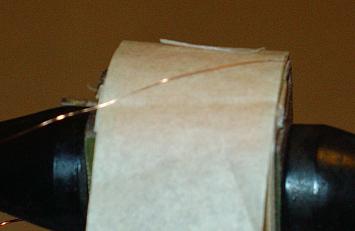
Figure 16 Z-winding decomposition 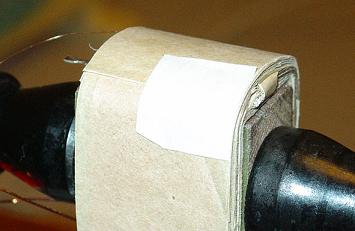
Figure 17 Z-shaped winding method decomposition 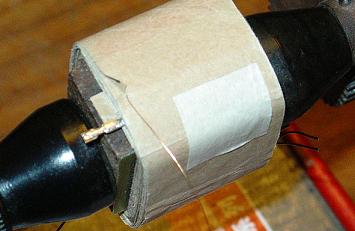
Figure 18 Z-type winding decomposition three
7. In the position of about 50 绕 around the beginning of the section, press the cable strip of 6-8 mm wide and fold in half. After the winding is completed, the tail is threaded into the paper strip, and the paper strip is tightened to finish the end, as shown in Fig. 8; 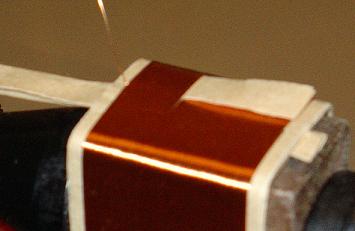
Figure 8 Beginning of the first paragraph
8, welding the wire soldering piece, set of yellow wax casing, wrapped 0.08 cable paper insulation, see Figure 9 - Figure 10; 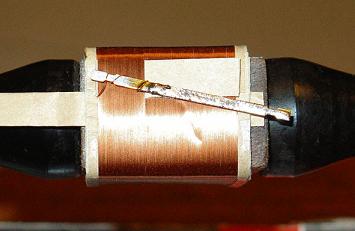
Figure 9 leads the solder tab 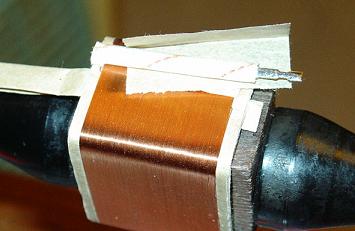
Figure 10 Solder sheet set yellow wax tube pad insulation paper
9, between the group insulation, winding 0.08 cable paper 2 layers, 0.12 yellow wax silk 1 layer, yellow wax thick sandwich in the middle of the cable, see Figure 11; 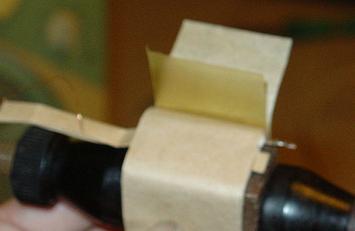
Figure 11 Adding insulation paper between groups
10, around the first paragraph of the secondary, use a yellow wax casing to cover the wire and soldering, and wrap the cable paper and then wrap, see Figure 12; 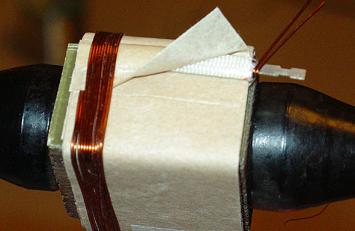
Figure 12 around the first paragraph of the secondary
11. The first section of the secondary coil is finished, and the two sections of the coil are flattened with an elastic paper pad of suitable width and thickness, as shown in Fig. 13; 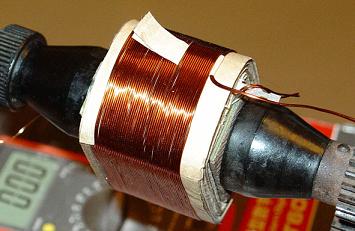
Figure 13 The first paragraph of the second paragraph
12, the insulation between the groups, the same as step 9;
13. Welding the upper part of the primary part, and then winding the next section. The welding layer consists of 2 layers of 0.08 cable paper, 1 layer of 0.12 yellow wax cloth, and yellow wax cloth sandwiched between the cable papers, see Figure 14; 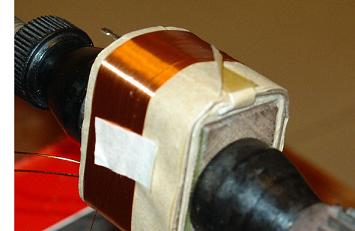
Figure 14 connects the primary, around the primary second
14. After each layer is wound, it is necessary to stick the anti-collapse protection edge. Figure 15 is the effect diagram of the coil and the anti-collapse protection edge; 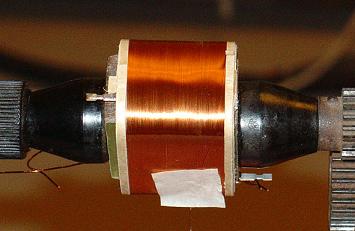
Figure 15 Winding and anti-collapse edge
15. After the second stage of the primary is completed, the insulation between the groups is performed, and the method is the same as step 9;
16. Connect the upper secondary winding and the next secondary winding, see Figures 19 and 20; 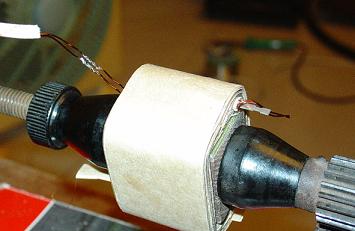
Figure 19, the second and second paragraph connection 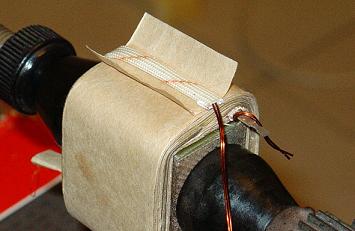
Figure 20 Adding yellow wax casing gasket insulation paper at the secondary joint
17, secondary finishing, casing, welding lead out the welding piece, padding the two ends of the coil, see Figure 21; 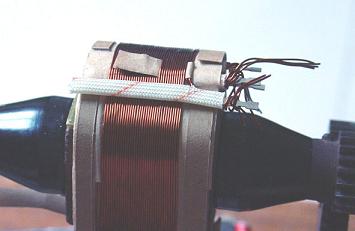
Figure 21 Secondary finishing and casing, with elastic paper pad flat
18, insulation between groups;
19, the first connection, around the last section of the primary coil, around the end of the connection, see Figure 22; 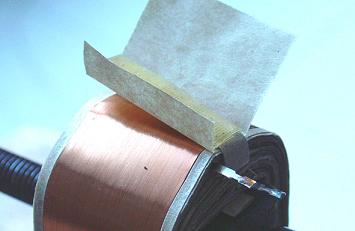
Figure 22 The last section of the primary winding connection plus insulation paper
20, outside the group insulation, winding 0.08 cable paper 2 layers and a half (half layer paper tape joints are arranged in the iron core window), 1 layer of 0.12 yellow wax thick, line package is completed, see Figure 23. 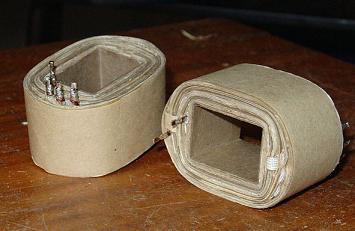
Figure 23 Adding external insulation, soldering out the wire, and completing the wire package
21, add a baffle (line pack baffle with 0.4 elastic paper, iron core with 0.35 fiberglass plate), insert E-shaped film, see Figure 24; 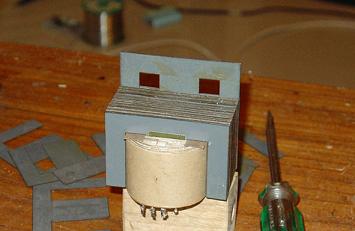
Figure 24 Add a word block to insert the E-core
22, after inserting the E piece, install the iron core angle clamp iron, place the wire package block, see Figure 25; 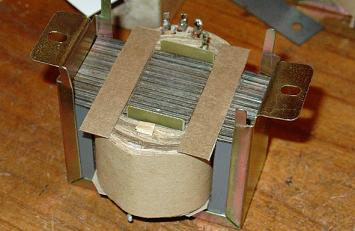
Figure 25 Z-shaped iron core is loaded into the corner clamp iron, and a word block is placed.
23. Place a suitable thickness of coated paper as the width of the air gap, see Figure 26; 
Figure 26 Place the appropriate thickness of the copper paper as the width of the air gap
24, insert I word, see Figure 27; 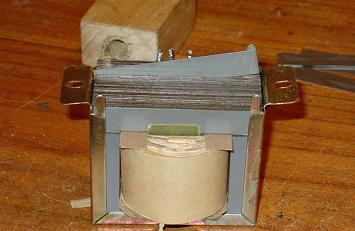
Figure 27 Insert I piece
25. Tighten the I piece and wrap the bottom plate of the angled iron, see Figure 28. 
Figure 28 Installation of the corner plate The iron plate has a good bottom plate, and the output of the cow is initially completed. Figure 29 is an effect diagram, and then the initial measurement, drying, dipping paint .......... 
Figure 29 The cow is basically made, then...
Indoor Led Screen,Programmable Led Signs Indoor,Indoor Led Video Wall,Indoor Led Display Screen
Shenzhen Apexls Optoelectronic Co., Ltd , https://www.apexls-display.com