The appearance of Sony PlayMemories Camera Apps has greatly enhanced the camera's expansion capabilities and added a higher added value to the camera. Many of the topics that previously required the use of professional equipment to shoot were now only required for a simple APP. Sky HDR is such an APP that is specially designed to cope with the high light ratio environment. For example, when the sun goes down, the exposure value of the sky and the ground is very far away. At this time, if you are metering the sky, you can only shoot such photos:
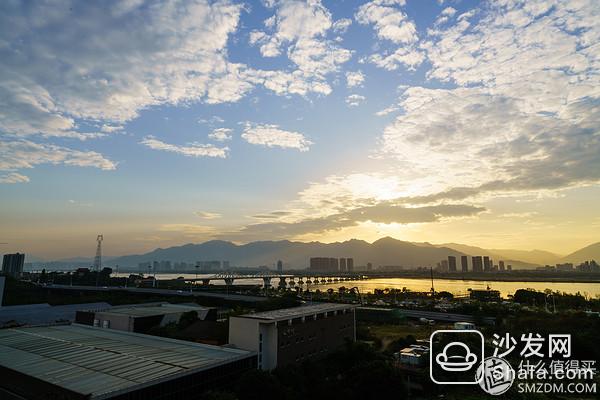
The details of the sky are all there, but the ground is dark. So what if you measure light towards the ground?

The result is accurate ground exposure, but the sky is pale. This is a problem that many photo enthusiasts often encounter. The highlights are more than the environment, the high-lighted sky, and the shadowed ground. Both can only be discarded. Or take the middle of an exposure and squeeze the latitude with RAW later. But in fact, this is not perfect, especially when the light is too strong and the light is too strong. When you pull the shadow, there are too many details of the loss. More importantly, it is very easy to have very unnatural black or white areas. For example, the following one is made by forcing the RAW to post-production, and the highlight area is white.

So most landscape photographers choose GND filter this solution. However, the professional GND filter is not cheap and it is quite complicated to operate. This is a big reason for many photographers to stop there.

So now Sony camera users have a new choice: Sky HDR. The working principle of the APP is to take a photo of the sky exposure, and then add a certain amount of exposure compensation to take a shot. The camera's interior is combined into a photo by a gradient filter algorithm.
 Sky HDR | PlayMemories Camera Apps This app is capable of shooting extremely bright contrasting photographs of the environment with the most appropriate exposure, such as “the earth facing the sun and the shadows in the skyâ€. Direct link
 It sounds complicated, but actually it's actually very simple. So dry goods come:
Real shot case one: blue sky.
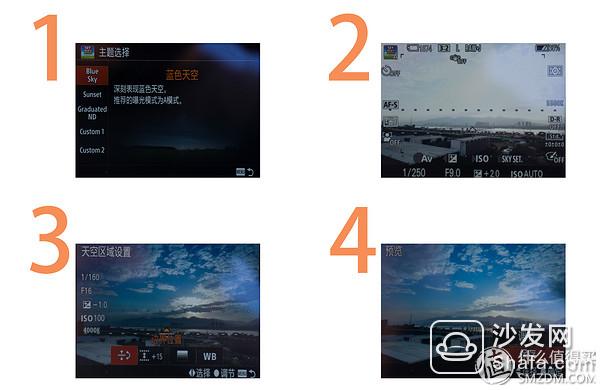
1, open the sky HDR, select the blue sky.
2, enter the shooting interface, press the "delete key" to set the sky.
3, adjust the border to the horizon.
4, press the shutter to take a picture, save, save. The camera then takes two consecutive shots and synthesizes the following effects.

This can easily solve the problem of high light ratio shooting, and the sky boundary can also help you locate the horizon with great precision. But when you look at this, some people may want to say that if the sky that needs a gradual change is not a horizontal line, but it is embarrassing, then what should be done? It doesn't matter that the boundary HDR's border adjustments also support 360° dead-end rotations.
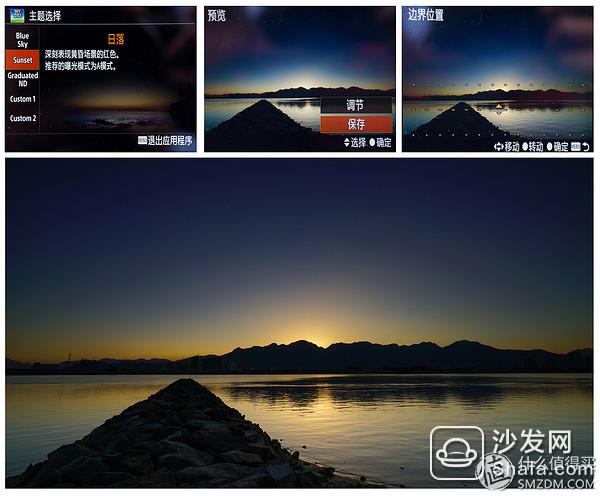
Real shot case 2: tilted boundary line.

1. On the edge of the river, the sunlight on the river to map the sky is also a high-light area, so you need to rotate the boundary to the river bank.
2. Set sky exposure compensation to balance the exposure difference between sky and ground.
3. Adjust the white balance mode to cloudy days, which is the closest to the color temperature seen at the scene.
4. The color temperature on the left of the rubble is too low, making the whole picture look dirty. Therefore, the color temperature was raised a bit later in the process, making the photos more integrated.
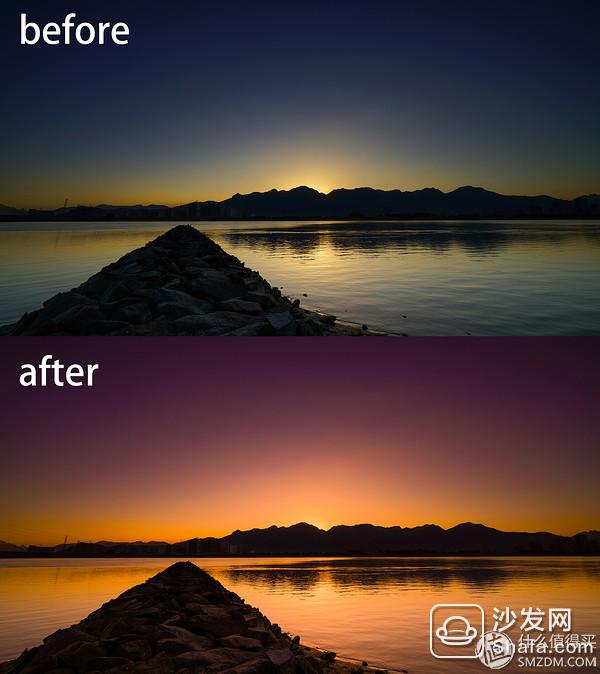
Real shot case three: secondary border adjustment.
If you are not satisfied with the location of the initial set of sky boundaries, it does not matter, there is a chance to adjust after the shooting. The most important thing is that this adjustment can see the effect in real time and make it more intuitive.
Other features highlights:
In addition to pre-made blue sky, sunset, standards and other topics, "HDR HDR" also reserves custom functions for professional players. More importantly, Sky HDR also supports RAW! This is very powerful, which is equivalent to having two stacks of different exposure photos directly in the early stage, leaving a huge space for the later period.
to sum up.
If you have been bothered by the spectacle for more than occasions, then HDR is a great solution. Basically, it can replace most applications of GND filter, allowing you to take advantage of the highlights and shoot the sky full of details. In particular, if you use the smooth reflection APP, you basically grab the ND filter's rice bowl. In addition, the purchase cost of Sony's APP is not high. To know the price of a professional filter, you can probably buy all the applications in the Sony Camera App Store.
Auto Rotation Cleaver,High Precision Optical Fiber Cleaver,Optical Fiber Cleaving,Auto Fiber Cleaver
Guangdong Tumtec Communication Technology Co., Ltd , https://www.gdtumtec.com